Collecting data from bluetooth sensors
When you create an observation, in addition to the multimedia data you can obtain from your phone, Peneira can retrieve data from bluetooth sensors to include in your observations. We are referring to different types of sensors for measuring sunlight, noise, CO₂, humidity, temperature, pressure, air quality or any other environmental or industrial parameter.
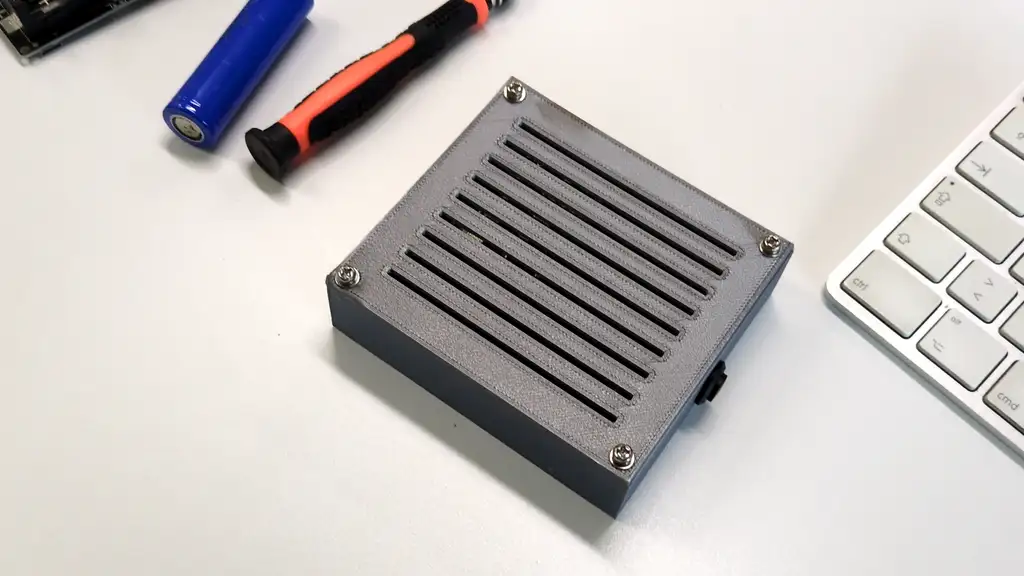
For beginners
Here is a step-by-step guide on how to do it using friendly devices like micro:bit and analog sensors, including ready-to-use downloadable examples.
For advanced users
Here are detailed instructions so you can configure your own device to send data via Bluetooth in a format that Peneira understands. This information is independent of the type of hardware used: it can be Arduino boards, micro:bit, Raspberry Pi or other similar devices.
Configuring your device to send data to Peneira
This guide explains how you should design your device to send data via Bluetooth in the correct format. This documentation is independent of the type of hardware used: it can be Arduino boards, micro:bit, Raspberry Pi or other similar devices.
You can use various types of sensors, such as measuring sunlight, noise, CO₂, humidity, temperature, pressure, air quality or any other environmental or industrial parameter. What really matters is that the device exports the data in a standardized JSON format.
Data format specifications
The device must send data in JSON format, with a clear structure that allows the application to parse and display the information. The JSON must include:
- timestamp: Timestamp in ISO8601 format (for example,
"2024-12-11T10:00:00Z"). - device_name: Name or unique identifier of the device (for example,
"HM-10_Sensor_Node_001"). - owner: Name or identifier of the device owner.
- description: Brief description of the device's function or location.
- sensores: Array of objects, one for each sensor, in the following format:
- name: Name of the sensor (for example, "Temperature", "Humidity", "CO2", "Light", "Noise", etc.).
- value: Numeric value of the measurement.
- unit: Unit of measurement (for example, "°C", "%", "ppm", "lux", "dB").
Example of a correct JSON format
{
    "timestamp": "2024-12-11T10:00:00Z",
    "device_name": "HM-10_Sensor_Node_001",
    "owner": "Nome do admin",
    "description": "Sensor instalado na aula",
    "sensors": [
        {
            "name": "Temperatura",
            "value": 25.3,
            "unit": "°C"
        },
        {
            "name": "Humidade",
            "value": 58.2,
            "unit": "%"
        },
        {
            "name": "CO2",
            "value": 350,
            "unit": "ppm"
        },
        {
            "name": "Luz",
            "value": 12000,
            "unit": "lux"
        },
        {
            "name": "Ruido",
            "value": 42,
            "unit": "dB"
        }
    ]
}
Bluetooth communication
The device must use a Bluetooth LE module (for example, an HM-10) and must be configured to:
- Send data periodically.
- Use the service and characteristic that the application expects (in the example, service
0000ffe0-0000-1000-8000-00805f9b34fband characteristic0000ffe1-0000-1000-8000-00805f9b34fb). - If the device is not an HM-10, inform users of the exact UUID of the service and characteristic.
Send each JSON message followed by a newline character (\n), so the application can detect the end of each message. For example, in Arduino:
This makes it easier for the application to distinguish complete messages from partial fragments.
Make sure the complete JSON fits in the packet, or be aware that it may arrive fragmented. The application implements a buffer to reconstruct the complete message before parsing it.
Device Design Recommendations
- Clear device identification: use a unique and representative device name, which helps users recognize the device in the Bluetooth list. For example:
"HM-10_Sensor_Node_001"or"Greenhouse_Node_A". - Description and metadata: use the owner and description to provide context: who owns the device, where it is placed, what its function is. This helps the end user understand the origin of the data.
- Sensor structure: each sensor must have a clear name, a numeric value and a standardized unit. For example, "Temperature" → °C, "Humidity" → %, "CO2" → ppm, "Light" → lux, "Noise" → dB.
- Sending frequency: send data periodically at reasonable intervals (for example, every 5 or 10 seconds). The application is prepared to receive data at these intervals, displaying it as it arrives.
By following these guidelines, users can design their devices (Arduino, micro:bit, Raspberry Pi or other hardware) with various environmental or industrial sensors and export the data in standardized JSON format via Bluetooth. The application is ready to receive, parse and display this data in a clear and accessible way, ensuring seamless integration and a good user experience.
Micro:bit and Peneira
Micro:bit is an ARM-based embedded system, with open-source hardware, very popular and simple, designed by the BBC for use in computer education in the United Kingdom. It is present in millions of schools around the world. It is designed to facilitate the learning of computer programming, while offering many interesting features and connectivity.
In this example project, we are going to set up Micro:bit to connect to a light sensor and send the data to Peneira via Bluetooth signal.
You will need:
- A micro:bit board
- A micro:bit proto-board
- An analog light sensor
- If you want the device to work independently, you will also need a battery, a portable charger or similar to power it.
Program the micro:bit
First we need to create a program to read the sensor data and send it via Bluetooth. If you are familiar with Javascript, the code below is very easy to follow. You can adapt it to your needs.
Open https://makecode.microbit.org/ and create a new project. Give your project a name.
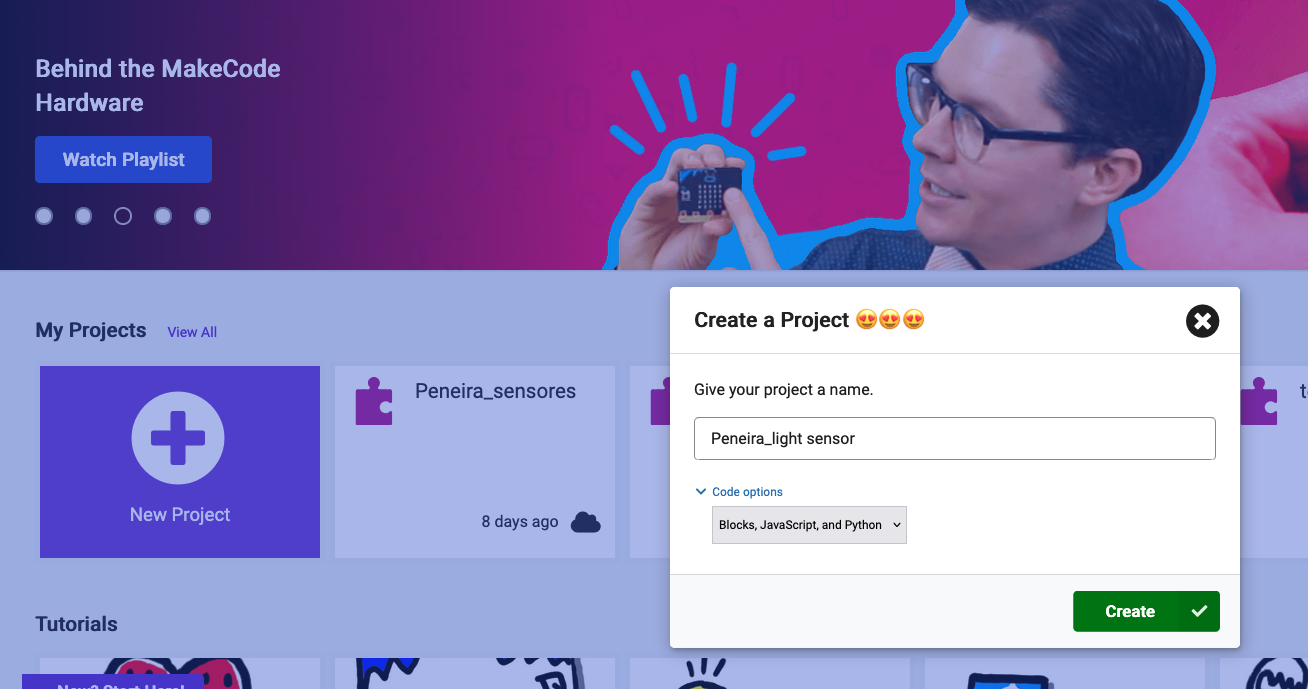
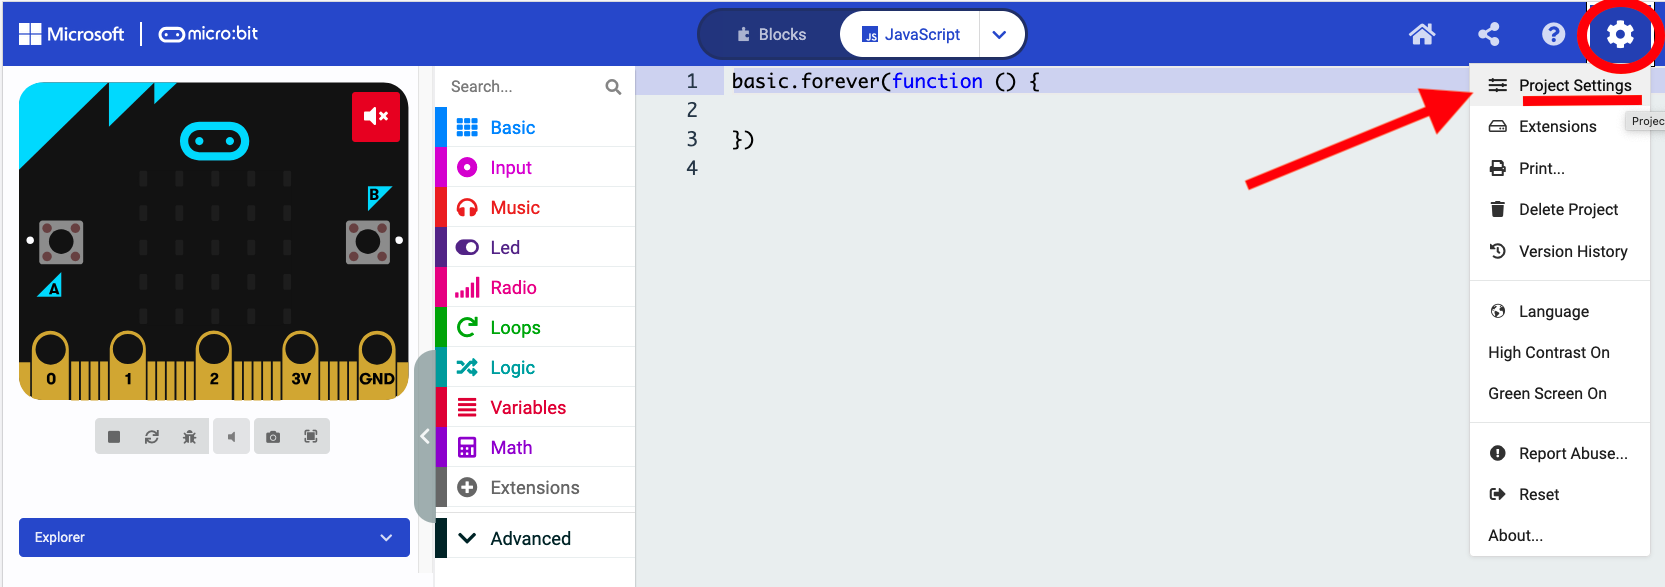
On the main page, go to the menu in the upper right corner (gear icon) and select "Project settings".
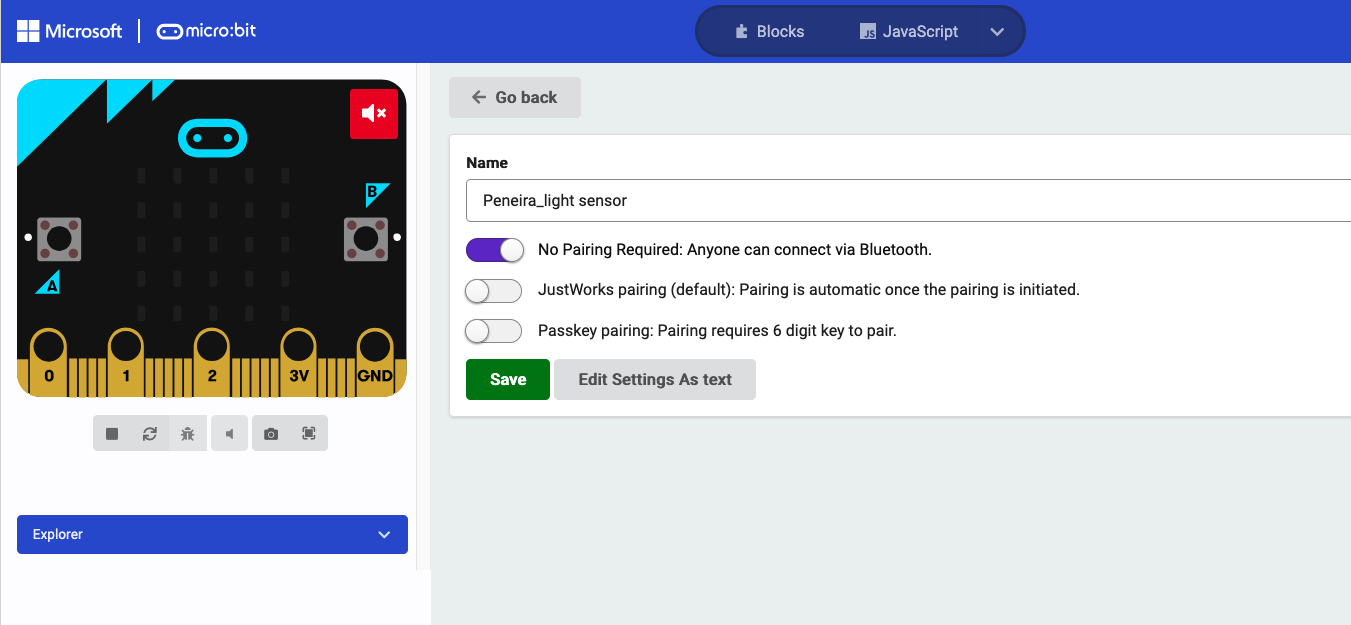
Select the first option: "No pairing required: anyone can connect via Bluetooth". Save.
Click on the Javascript option in the top blue menu (since we want to paste the code, not compile it from scratch in the Blocks language).
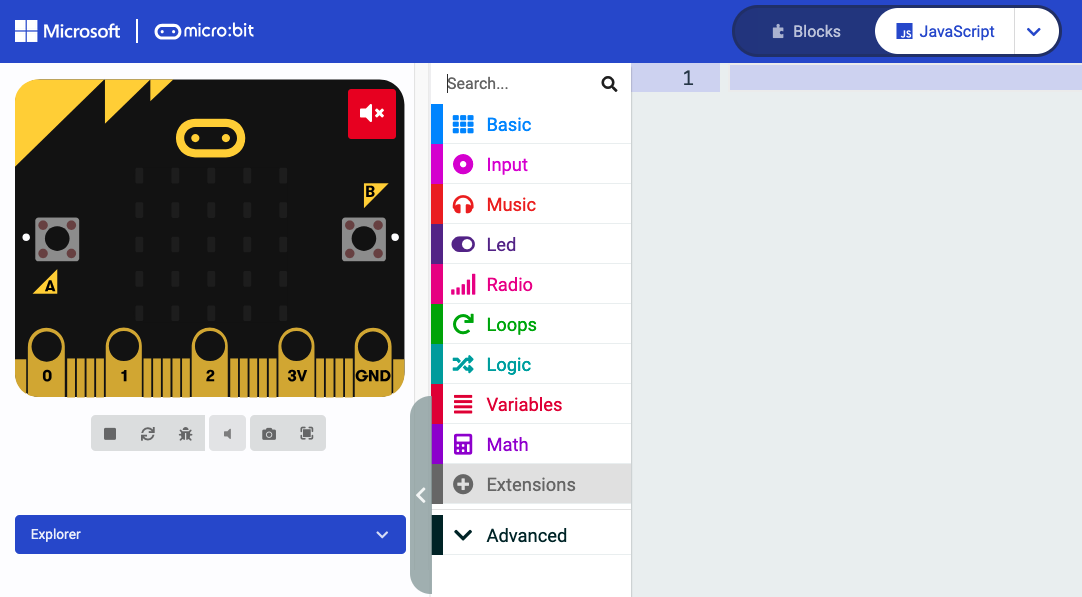
Click on the "+ Extensions" menu in the central bar to add Bluetooth functionality to our program.
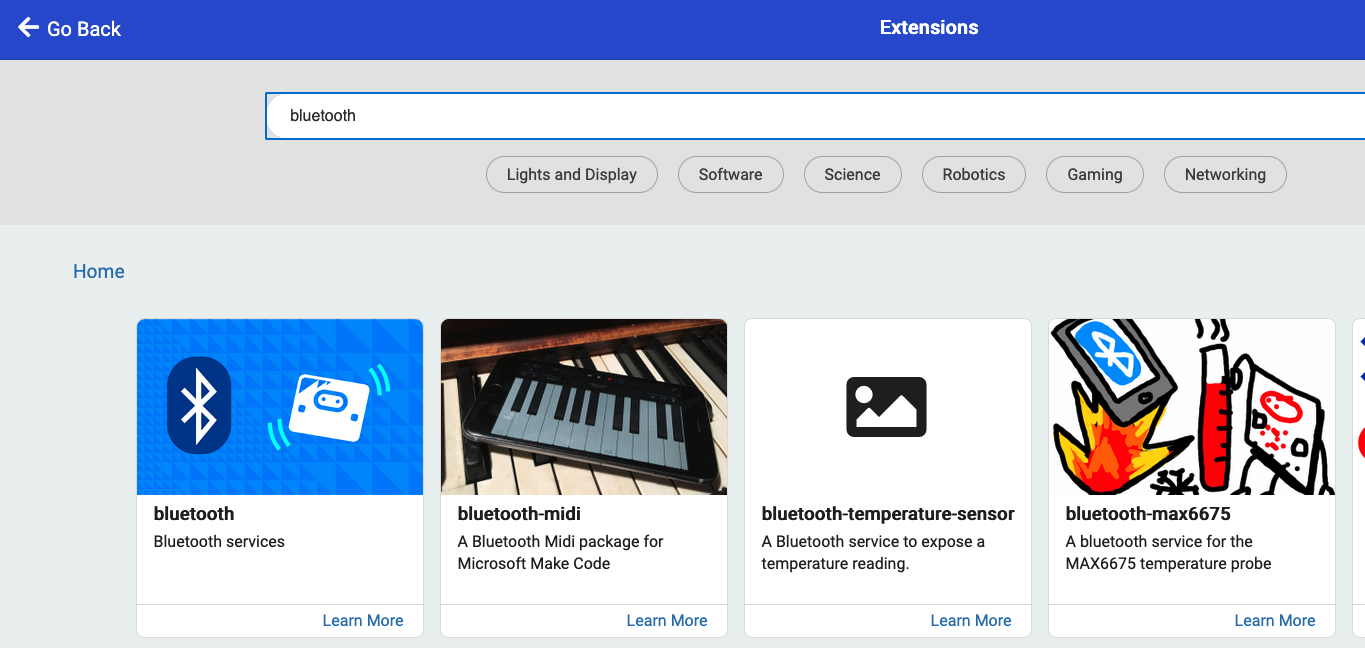
Search for "bluetooth" in the search bar and click on the first option "bluetooth services".
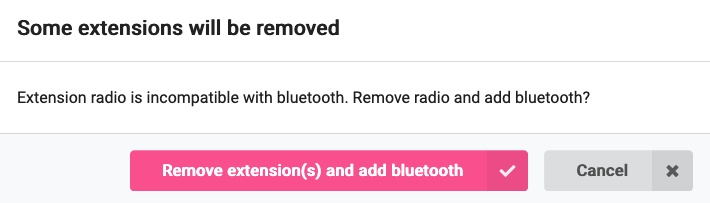
A pop-up window will warn us that enabling Bluetooth services will remove the radio extension. Click on the "Remove extension and add Bluetooth" button.
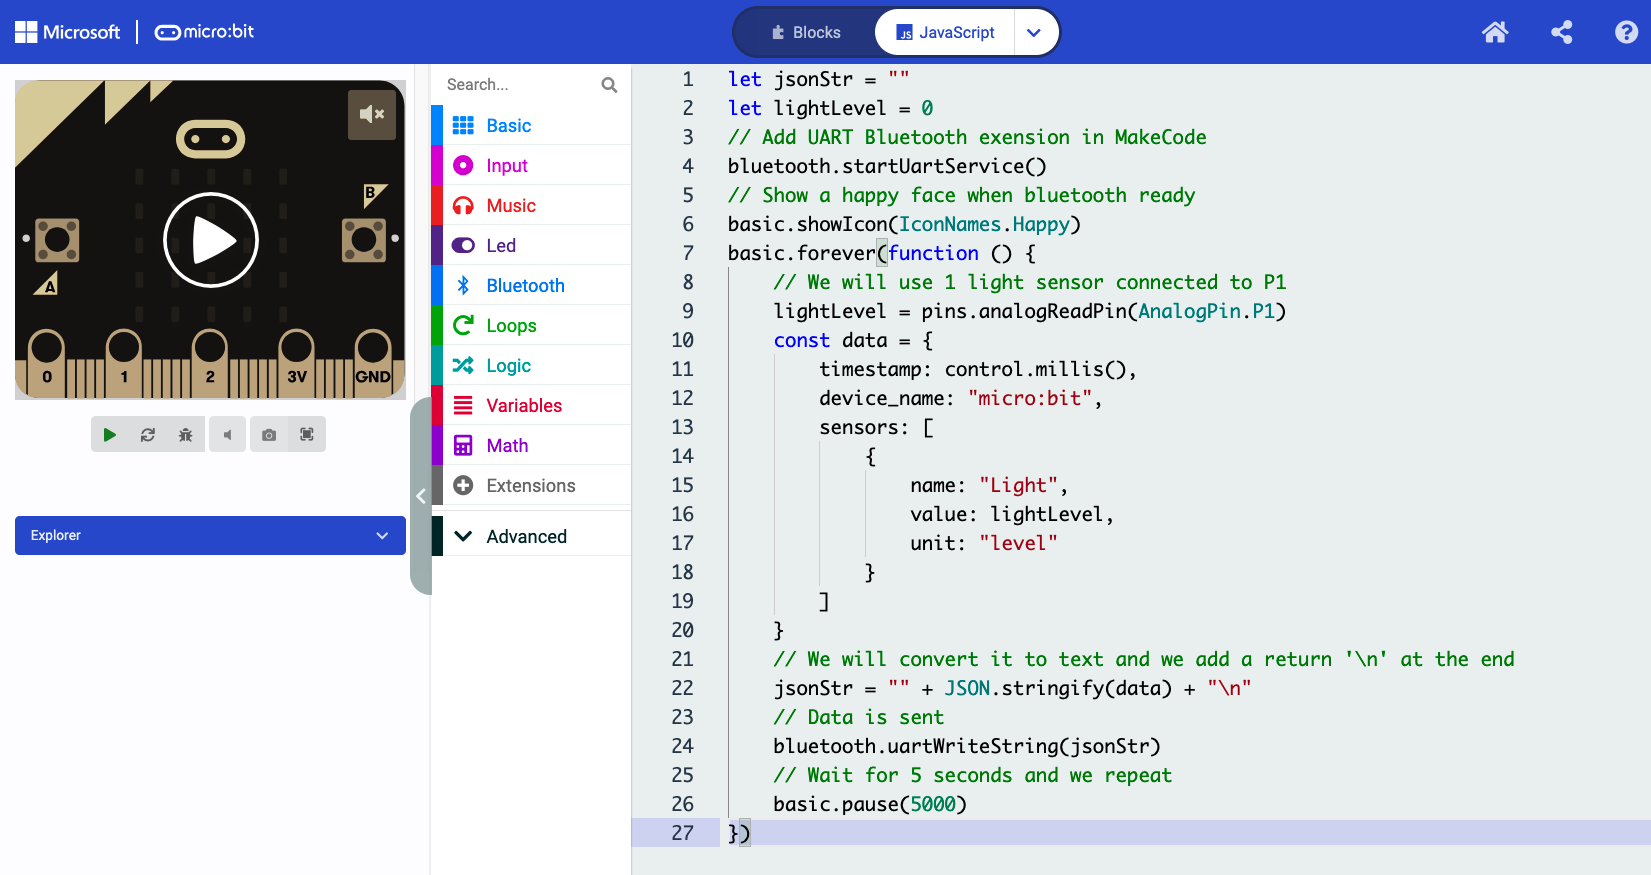
It's time to add our code! Delete the default code and paste the following code:
let jsonStr = ""
let lightLevel = 0
// Engade UART Bluetooth extension en MakeCode
bluetooth.startUartService()
// Amosa unha cara contenta cando está listo o bluetooth
basic.showIcon(IconNames.Happy)
basic.forever(function () {
    // Usaremos 1 sensor de luz conectado ao P1
    lightLevel = pins.analogReadPin(AnalogPin.P1)
    const data = {
        timestamp: control.millis(),
        device_name: "micro:bit",
        sensors: [
            {
                name: "Light",
                value: lightLevel,
                unit: "level"
            }
        ]
    }
    // Convertiremos a texto e engadiremos un fin de liña '
' ao final
    jsonStr = "" + JSON.stringify(data) + "
"
    // Envío de data
    bluetooth.uartWriteString(jsonStr)
    // Agarda 5 segundos e repite
    basic.pause(5000)
})
It should look like this. You can see the comments in green and you can make any changes you want or check how it looks in the Blocks language.
Now you are ready to download this code to your Micro:bit. Connect it to your computer and send the code.
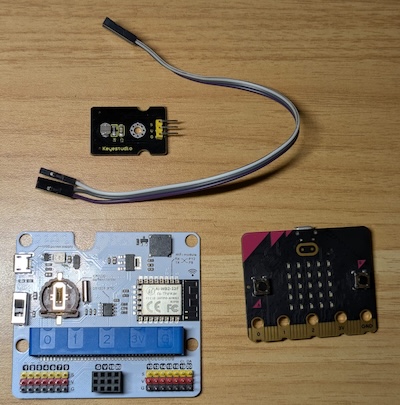
Connect the micro:bit to the board and the light sensor
Now that we have our micro:bit with the program, we need to connect it to a proto board and connect the light sensor to pin P1 (if you want to use another pin, remember to change it in your program).
For this example, we used the following elements:
- Micro:bit V2
- Internet WIFI Breakout Board For micro:bit (from ElecFreaks)
- 3 jumper wires (female-female) to connect the sensor to the board
- Analog light sensor (Keyestudio TEMT6000)
Make sure to connect the wires to the sensor and the board following the same letter code (s-v-g) or it will not work.
Now we connect it to a power source (batteries or your PC).
Time to try it!
Once our micro:bit and the sensor are working, we return to Peneira from our phone.
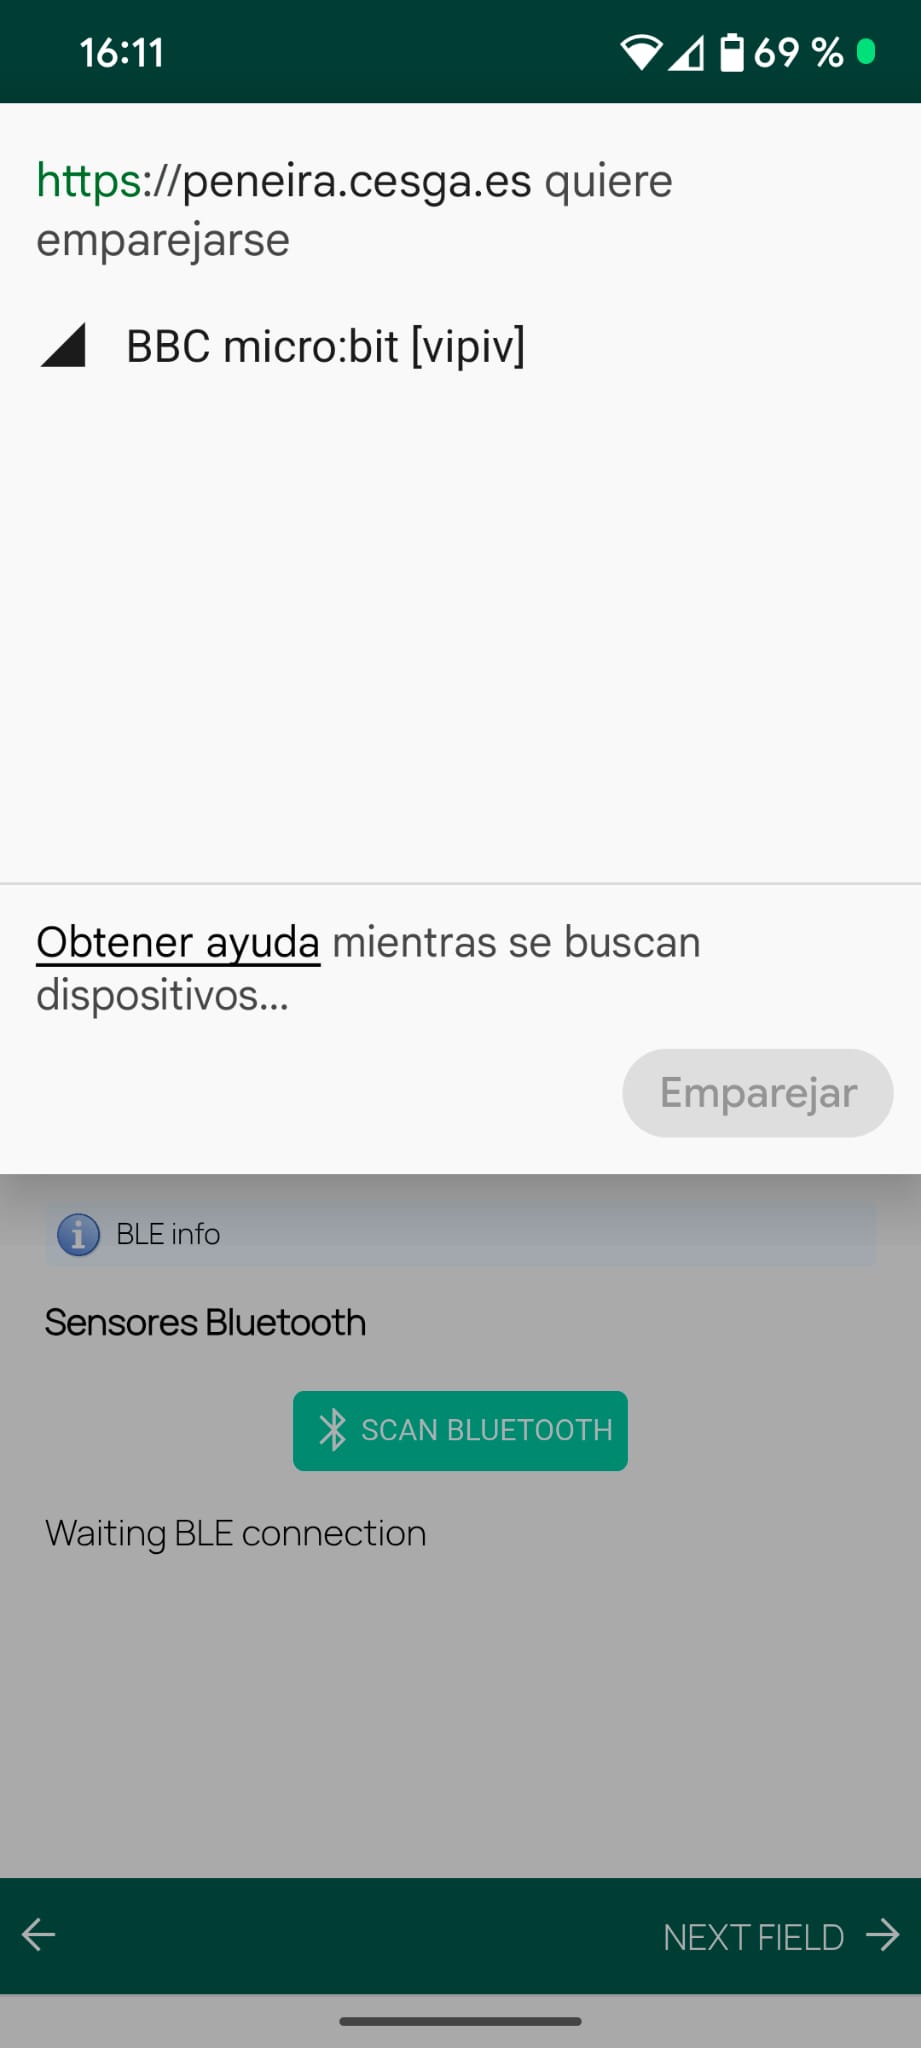
We should have a Peneira project with a field to capture bluetooth sensor data. When we want to complete this field, we must press the green "Scan bluetooth" button.
Then, our phone will start searching for nearby bluetooth devices. It should find our micro:bit module. If everything is correct, we should receive a notification from our phone, similar to this.
We should tap on our micro:bit name and tap "pair" to connect to it.
Once connected, we should see Peneira displaying the sensor values. In this example, we can see the light sensor and the captured level. However, we can have several sensors connected to our micro:bit, so we could have multiple data in this field.
Activate the slider to confirm the value we want to capture.
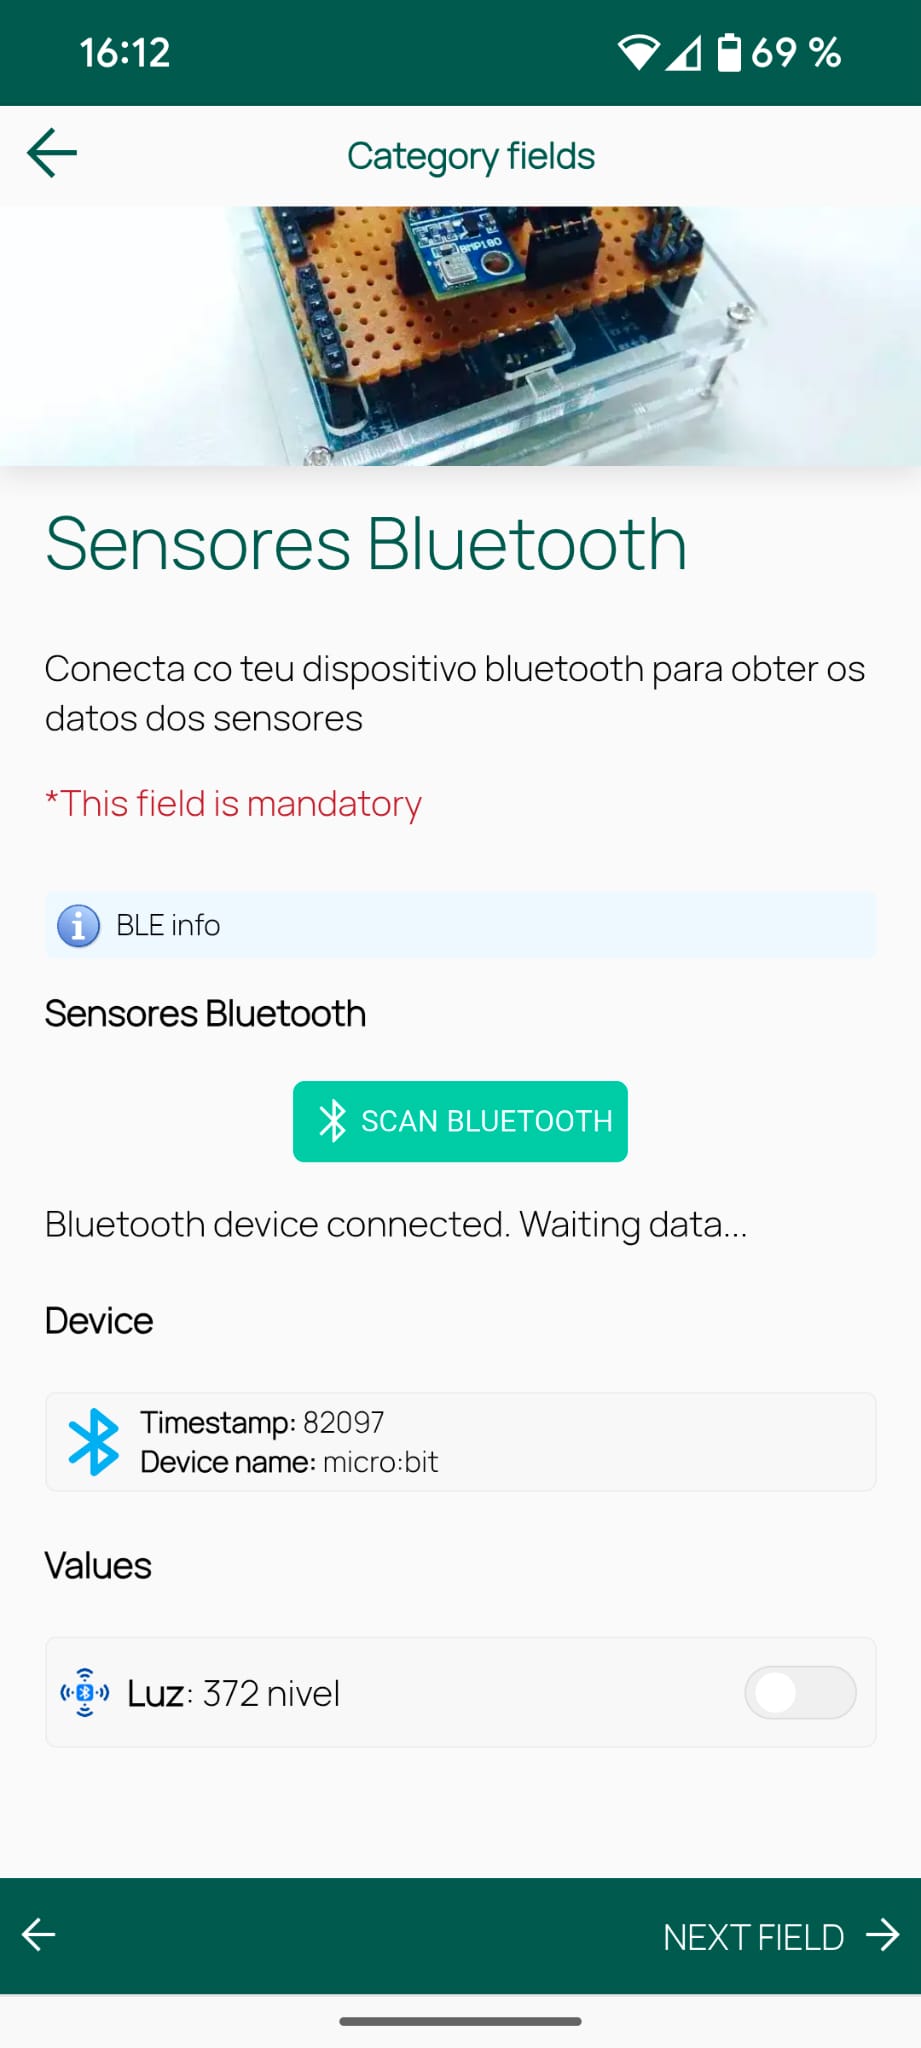
Click on Next field to confirm the capture and move on to the next field of your observation.