Create a project
Peneira Home Page
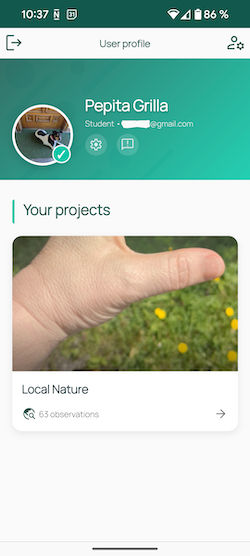
Once we log in with our user credentials, we can see the home page, with the different sections, from top to bottom:
The top white bar shows the logout icon (left) and your user profile settings (right).
The green area below shows your profile picture, name, account type, and email/username. The gear icon gives access to your profile settings and the bubble icon gives access to the user manual.
The main area shows your projects (both the ones you created and the ones you participate in). If this is your first time logging in or you haven't created any yet, this section will be empty.
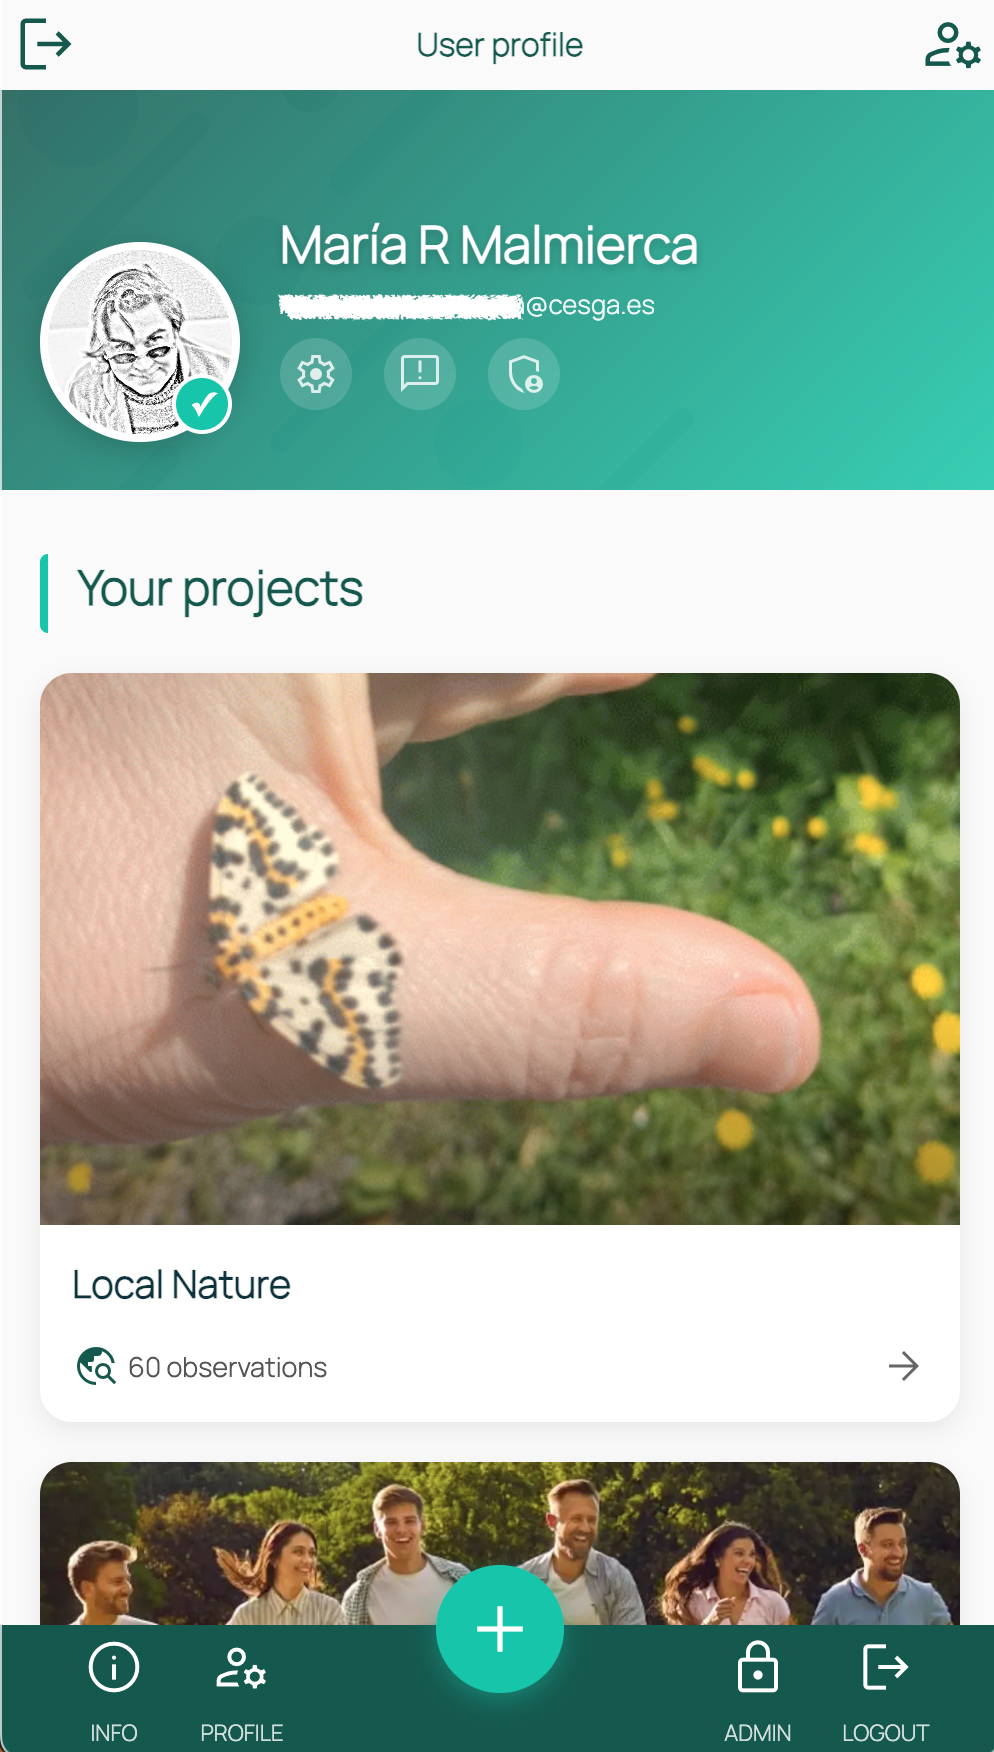
If you have an admin profile, a bottom bar will also appear with the following icons:
- Info: data policy, user guide, and a feedback form to send suggestions and issues.
-
- symbol on a green background: Click here to create a new project.
Choose the project type
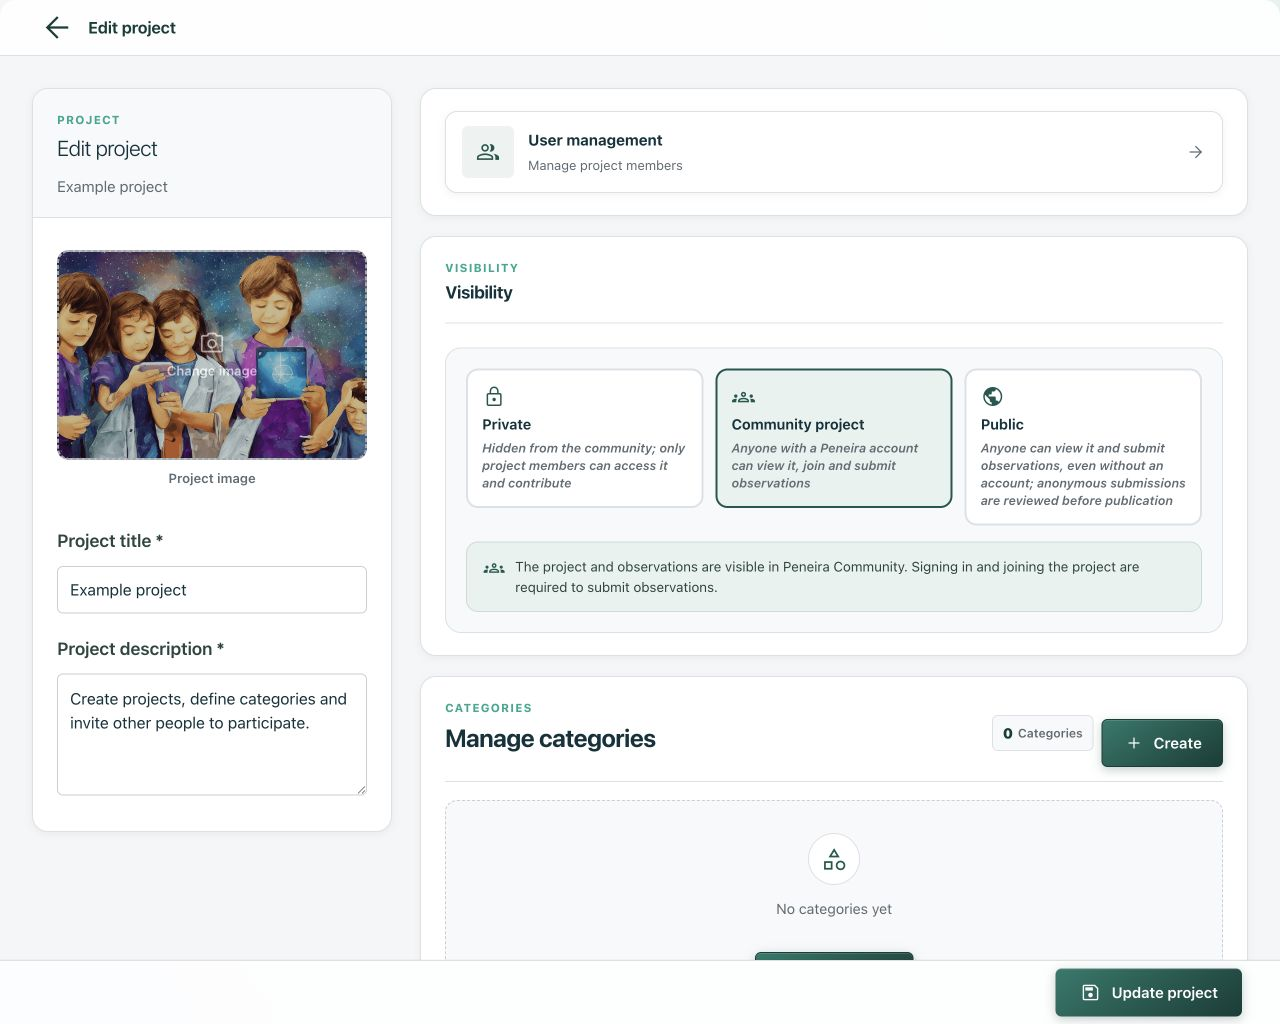
When you create a project, the Visibility section lets you decide who can see it and who can submit observations. The initial option is Private.
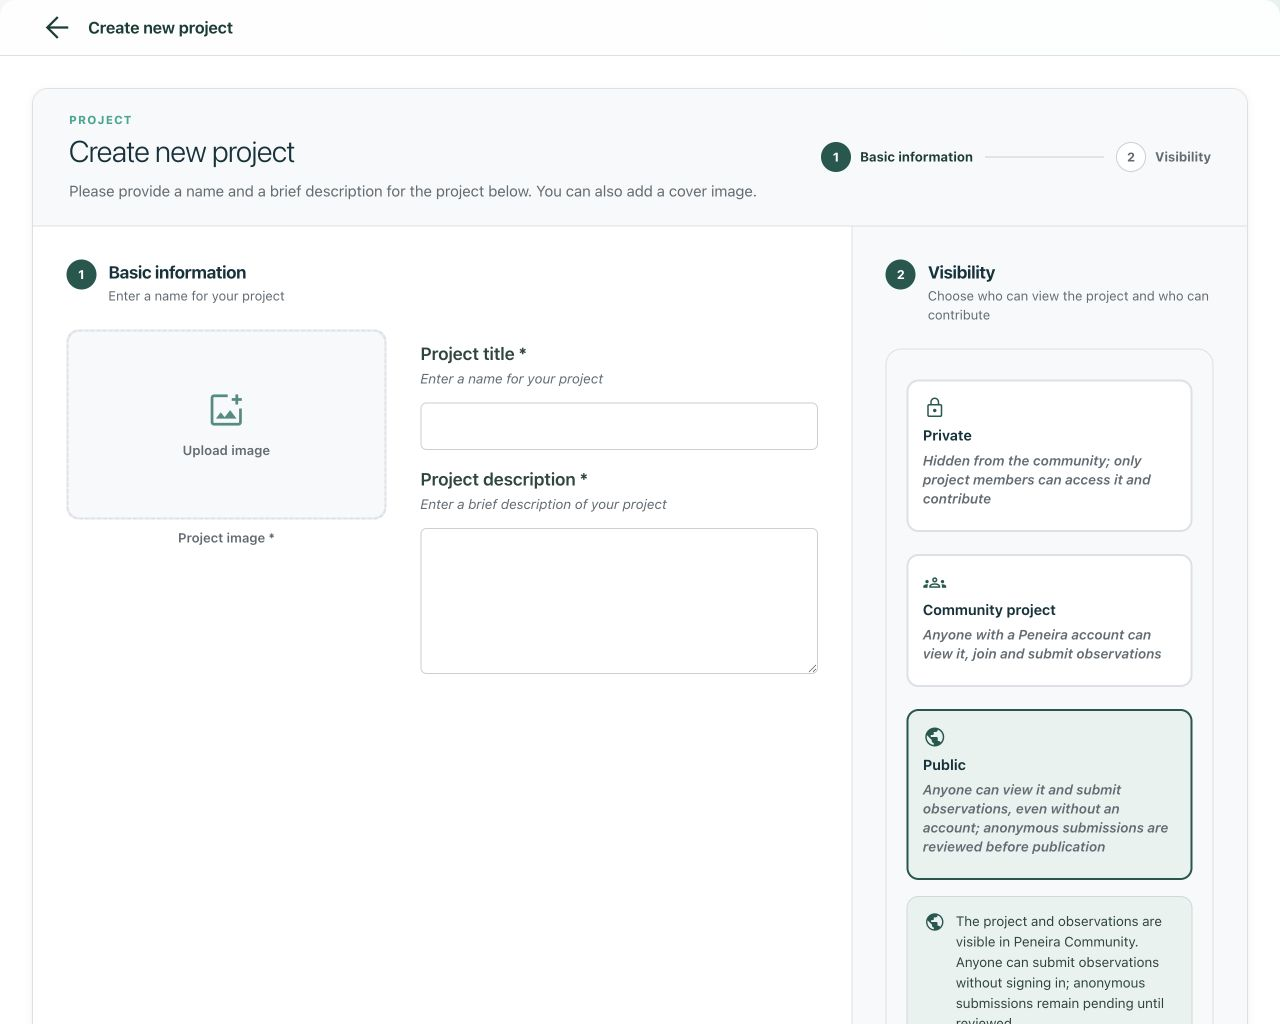
| Type | Who can see it? | Who can submit observations? |
|---|---|---|
| Private | Only people who are members of the project. It is not shown in Peneira Community. | Project members only. |
| Community project | Anyone can view the project's public page and its published observations in Peneira Community without signing in. | People with an account can request to join. They can submit observations after a project teacher approves the request. |
| Public | The same visibility as a community project. | Anyone, even without an account. Every observation remains pending until a project teacher reviews it. |
Which option should I choose?
Use Private for closed groups or work you are not ready to publish; Community project to control who can join and publish under their name; and Public to collect open contributions from anyone, even without an account, reviewing them before publication.
Participation and review flow
In a Community project, requesting access does not add the person immediately. While the request is pending, they can still view the project's public page and its published observations, but they cannot access its categories or submit observations. Once a project manager approves the request, they become a participant and can create observations. These are published immediately unless automatic moderation flags an individual observation for review.
In a Public project, a person with an account joins automatically as a participant, without prior approval. Observations can also be submitted without signing in. In both cases, every new observation remains pending and is excluded from public lists, maps, and counters until a project teacher approves it.
Change the type of an existing project
- Open the project you want to change.
- Open the three-dot menu and select Edit project.
- In the Visibility section, select Private, Community project, or Public.
- Select Update project to save the change.
Note
This change does not delete categories, users, or observations. When you switch to Private, the project is no longer visible in Peneira Community. When you switch to Public, every new observation is held for review, including observations submitted by signed-in participants.
Create categories and data fields
Create categories
To be able to collect data in a project, you must create one or more categories. You can have a project that only requires one category, for example "water quality", or, in other types of projects, for example "nature", you may want to group observations into different categories: "flora", "fauna", etc. This will make it easier to collect data for your users, as well as filter the results later.
To create a category, click the "add category" button in the main area.
You can also do this by clicking the 3-dot menu (top right bar) and selecting "add category".
The form you need to fill in is similar to the one you just filled in for creating the project:
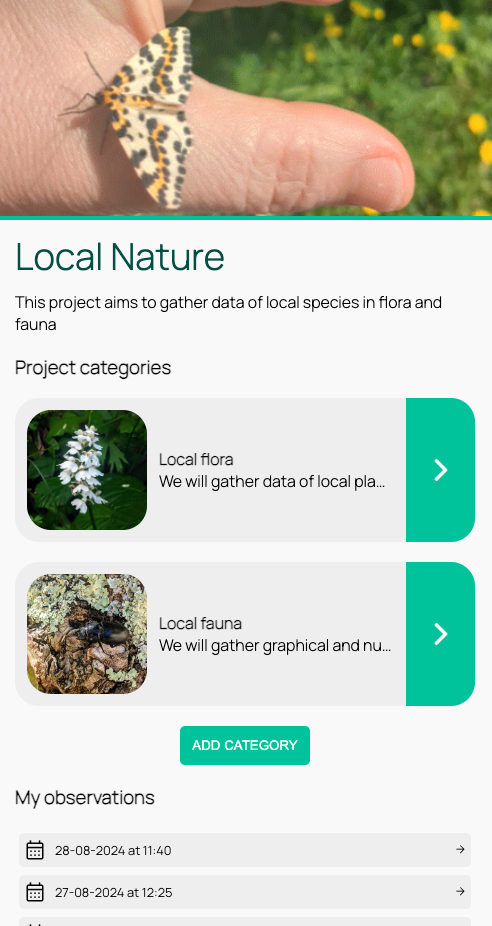
- Category title.
- Brief description of the category.
- Cover image.
Create data fields
Once the category is created, you must define the type of fields and their description so that participants can collect data in the project. For example, if you want them to collect certain data about fauna (species name, image, habitat, number of individuals...) you must add these fields and indicate their type.
To do so:
- Click the category to which you want to add the data fields.
- Click the 3-dot menu (top right bar) and select "edit category".
- Go to the bottom of the page and click "add a new field".
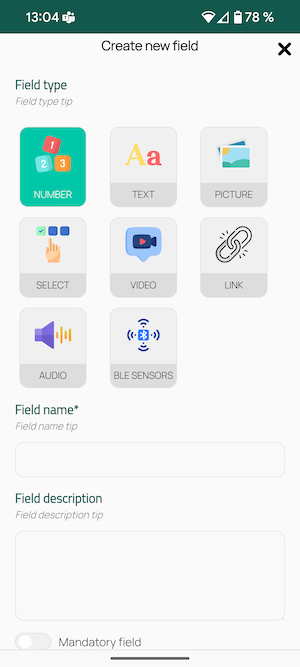
The first thing you must do is select the type of data you want to collect (the button changes color to green to indicate the selection) and then give that data field a name and a description or instructions for your participants on how to collect this field. For example, if you want your users to take a photograph of a plant, click the "Image" button and type something like "close-up image" in Field name and provide more information in the field description, if necessary: "take a close-up photo of the plant, making sure the leaves are clearly visible".
Fields can be defined to collect:
- Number (cardinal numbers only)
- Text (no character limit)
- Image (photo taken with the mobile phone camera or any image stored on your device)
- Dropdown selection menu (List of comma-separated items for the participant to choose from)
- Video (video taken with the mobile phone camera or stored on your device. Keep in mind that this can be a heavy file and difficult to transfer, so tell your users to keep it short)
- URL (web link to an external resource)
- Audio (sound recorded with the mobile phone microphone or stored on your device)
- Bluetooth sensor data (Android only). Peneira can connect to external wireless sensors.
A few more examples:
- IMAGE data type. Field name: Photo of the specimen. Description: Take a photo of the entire element, trying to make it appear complete.
- SELECTION data type. Field name: Habitat. Description: In what environment did you find the element? Choose: forest, riverbank, mountain, sandy area.
- TEXT data type. Field name: Scientific name of the species. Description: Indicate, if you know it, the name of the species.
A category can have one or more fields. You can even repeat several data types, for example text, to indicate different types of data in the same observation. For example, you could ask them to tell you the common name and, in another field, the scientific name of an observed element.
Once you have the list of fields you want to include in each observation of the category, save it. You can also reorder the fields so they appear before or after for your project participants.
You can always edit your category again to remove or add fields, but remember that observations collected before the modification will not include the new data you added.
In addition to the "manual" fields you include in your category, Peneira automatically collects additional fields:
- GPS. The endpoint of the observation allows it to be geolocated, indicating our position using the GPS on your mobile phone. If you are not located where you collected the information, you can drag your finger on the map to the place where the data was collected.
- Informant data: username
- Date and time of observation collection
- Weather information: humidity, temperature, altitude, atmospheric pressure, sky condition, wind speed
The collected information can be viewed individually from the app, either on the map or in the observation list.
Here is a video with a step-by-step explanation on how to create a project with its categories and fields: https://youtu.be/JEHmhQ3HlSM
Create users
For other people to participate by collecting data in your project (students, collaborators, etc.), you must first register them as users in Peneira and then add them to your project. To do this, you must have a Creator/Administrator profile for that project.
From the project's main page, click "User management" in the three-dot menu in the top right corner.
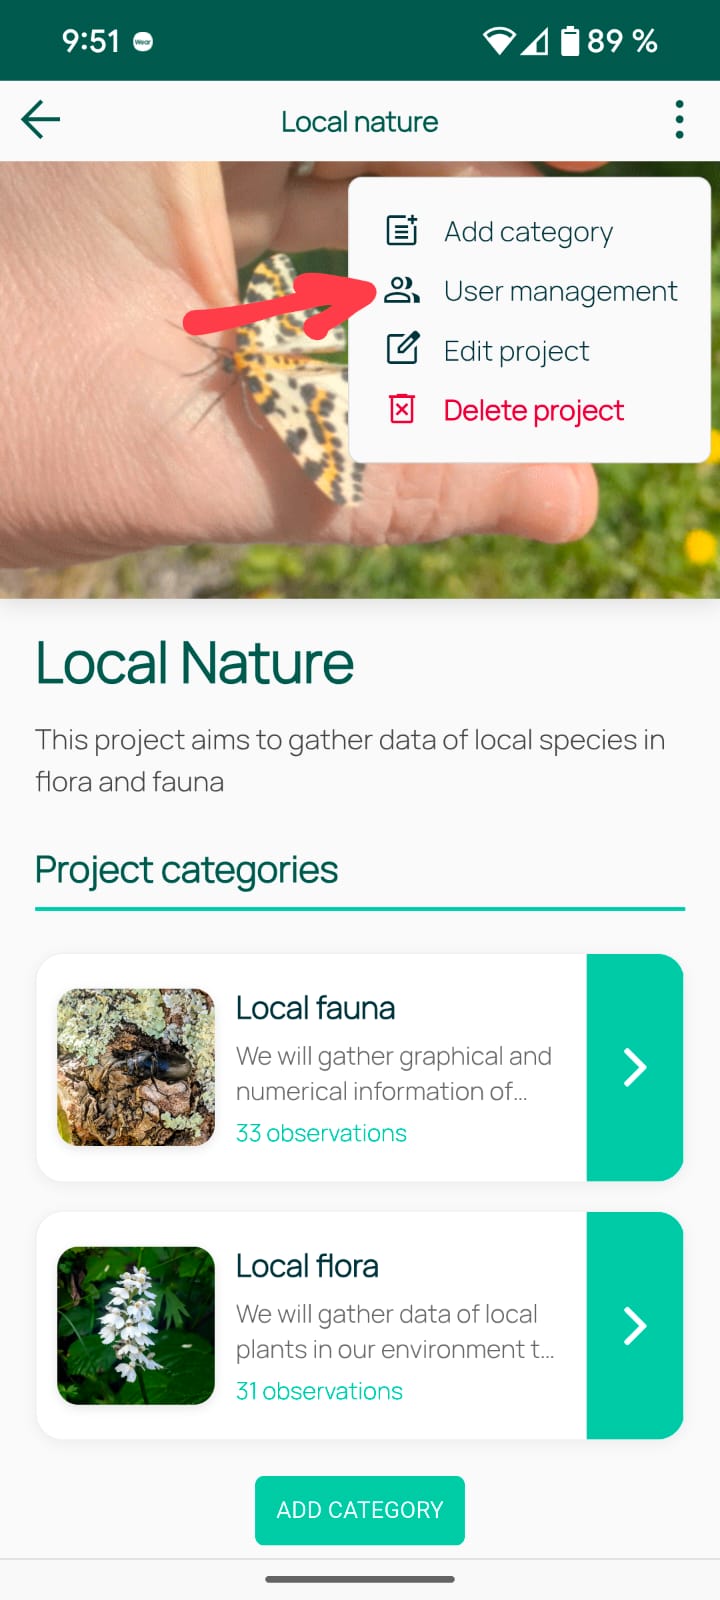
The following menu allows you to add individual accounts or a list of users at once (csv format).
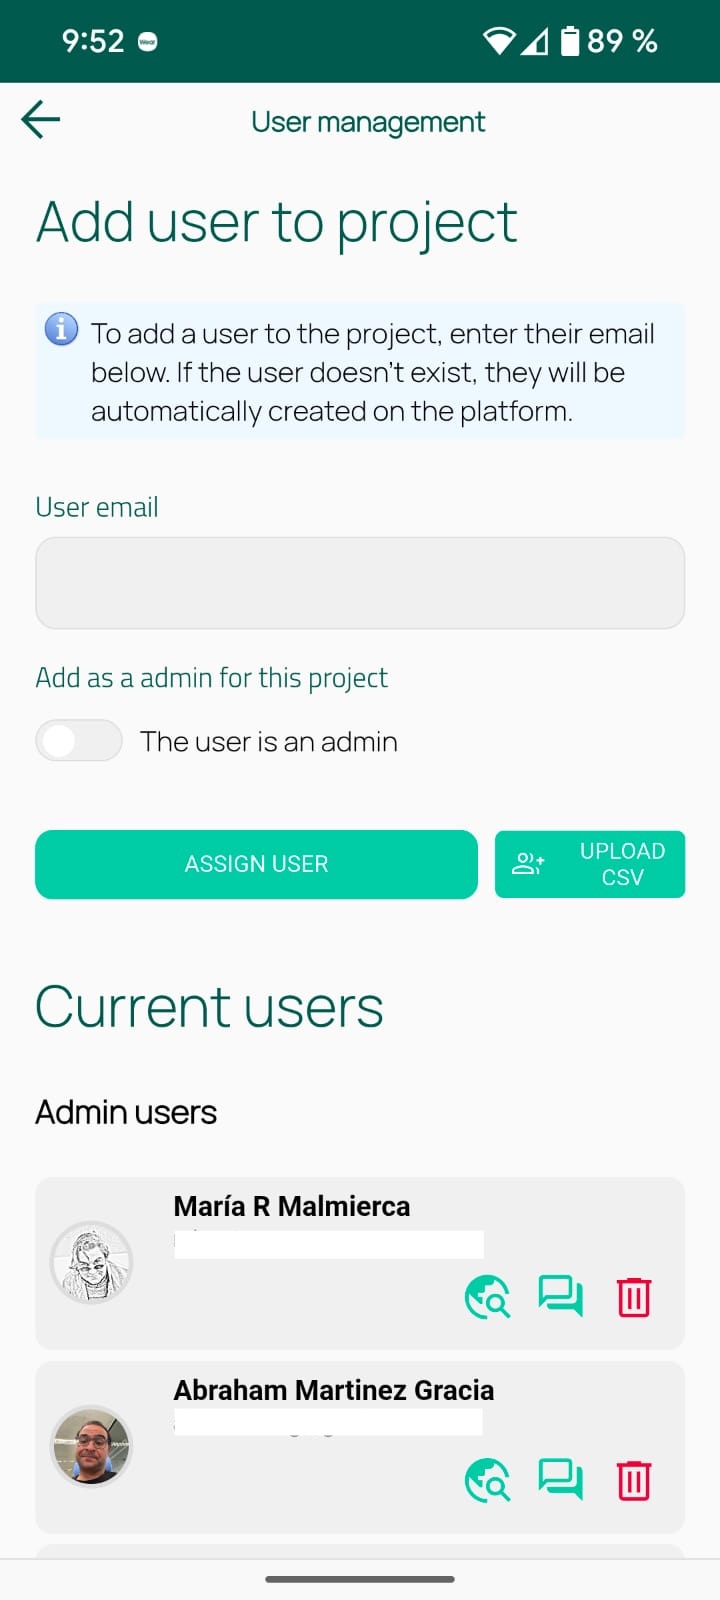
Add an individual user to the project
- Enter the user's email (or a username if you don't want to have an email associated with the account).
- Peneira detects if that email/username is already on the platform. If so, it assigns them to the project. If they are not registered on the platform, it asks you to add the name and password for the new user.
- If you want to assign a collaborator/administrator to your project (a teacher or additional researcher), check the "user is an administrator" box if you want them to have administrative rights on the project.
IMPORTANT
If you work with underage students, you can create accounts with a non-identifiable username instead of an email address. These accounts do not receive recovery emails: the responsible teacher can reset their password from participant management. See managed account recovery.
Add a list of participants to a project
Peneira allows you to easily include a list of participants in a project by uploading a CSV file with their data.
- To do so, click the "Upload a CSV" button in the User management section.
- Download the "sample CSV" list to your computer and open it with a spreadsheet program (LibreOffice, Excel, etc.).
- Fill in your users' data in the list: username, name, password. Do not delete the first row (header).
- Save your file. Remember that this should not change the CSV configuration: fields must be separated by semicolons (;) and no string delimiters (such as ") should appear.
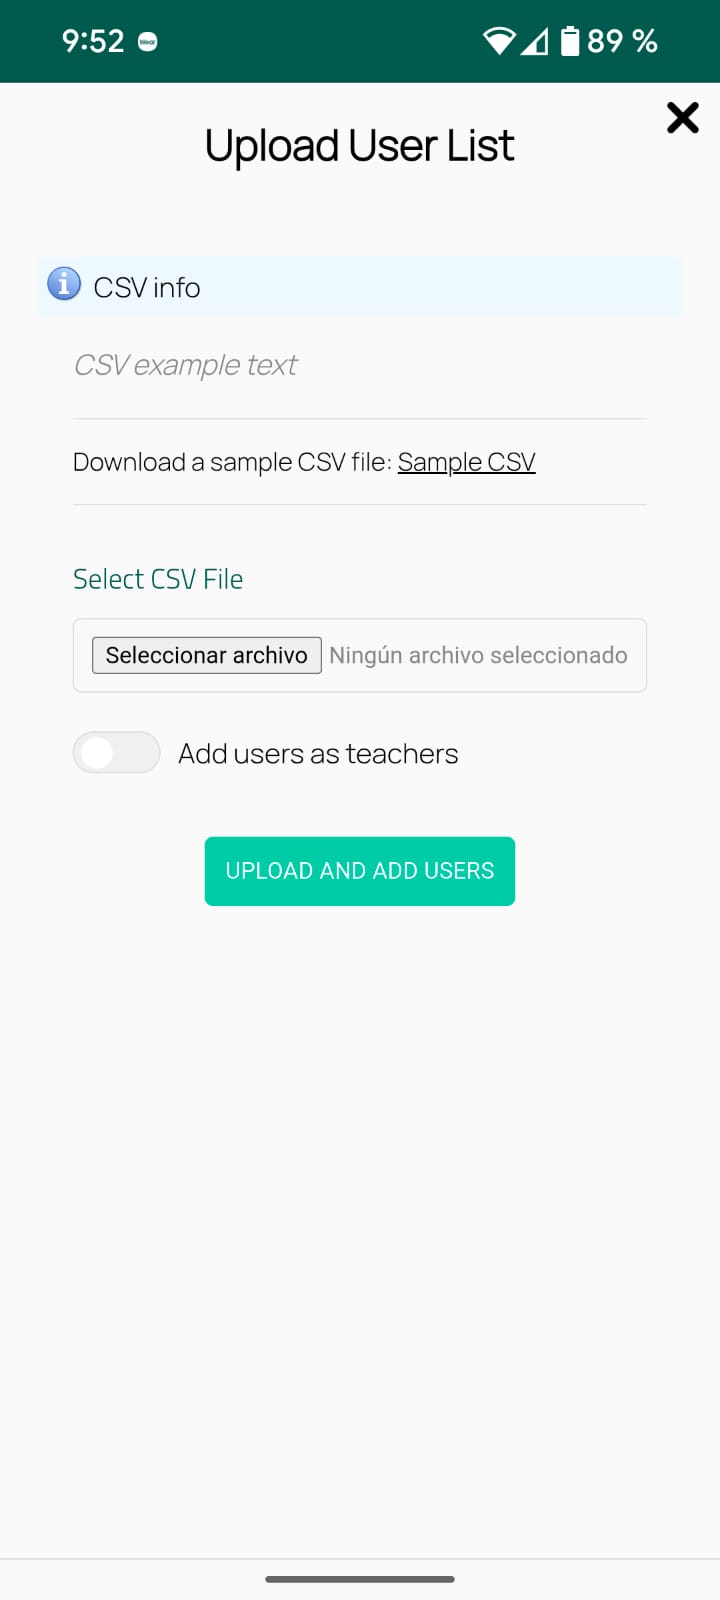
- Go back to the "Upload a CSV" section in Peneira and select your file.
- If you want this list of users to have administrator rights on your project (i.e., to be able to modify and manage your project), check the "add users as teachers" option.
- Click "Upload and add users".
- Your users should now appear in your project's list!
If there is any problem in the process, check your CSV file and make sure the correct options are selected. If you open the file with a notepad or similar, it should look like this:
Observation collection
Create an observation
Once the project is defined and your group of users (students/researchers) is enrolled, it's time to work!
To create an observation, follow these steps:
- Enter the project in which we want to add the observation data.
- Click the category to which your observation data would belong.
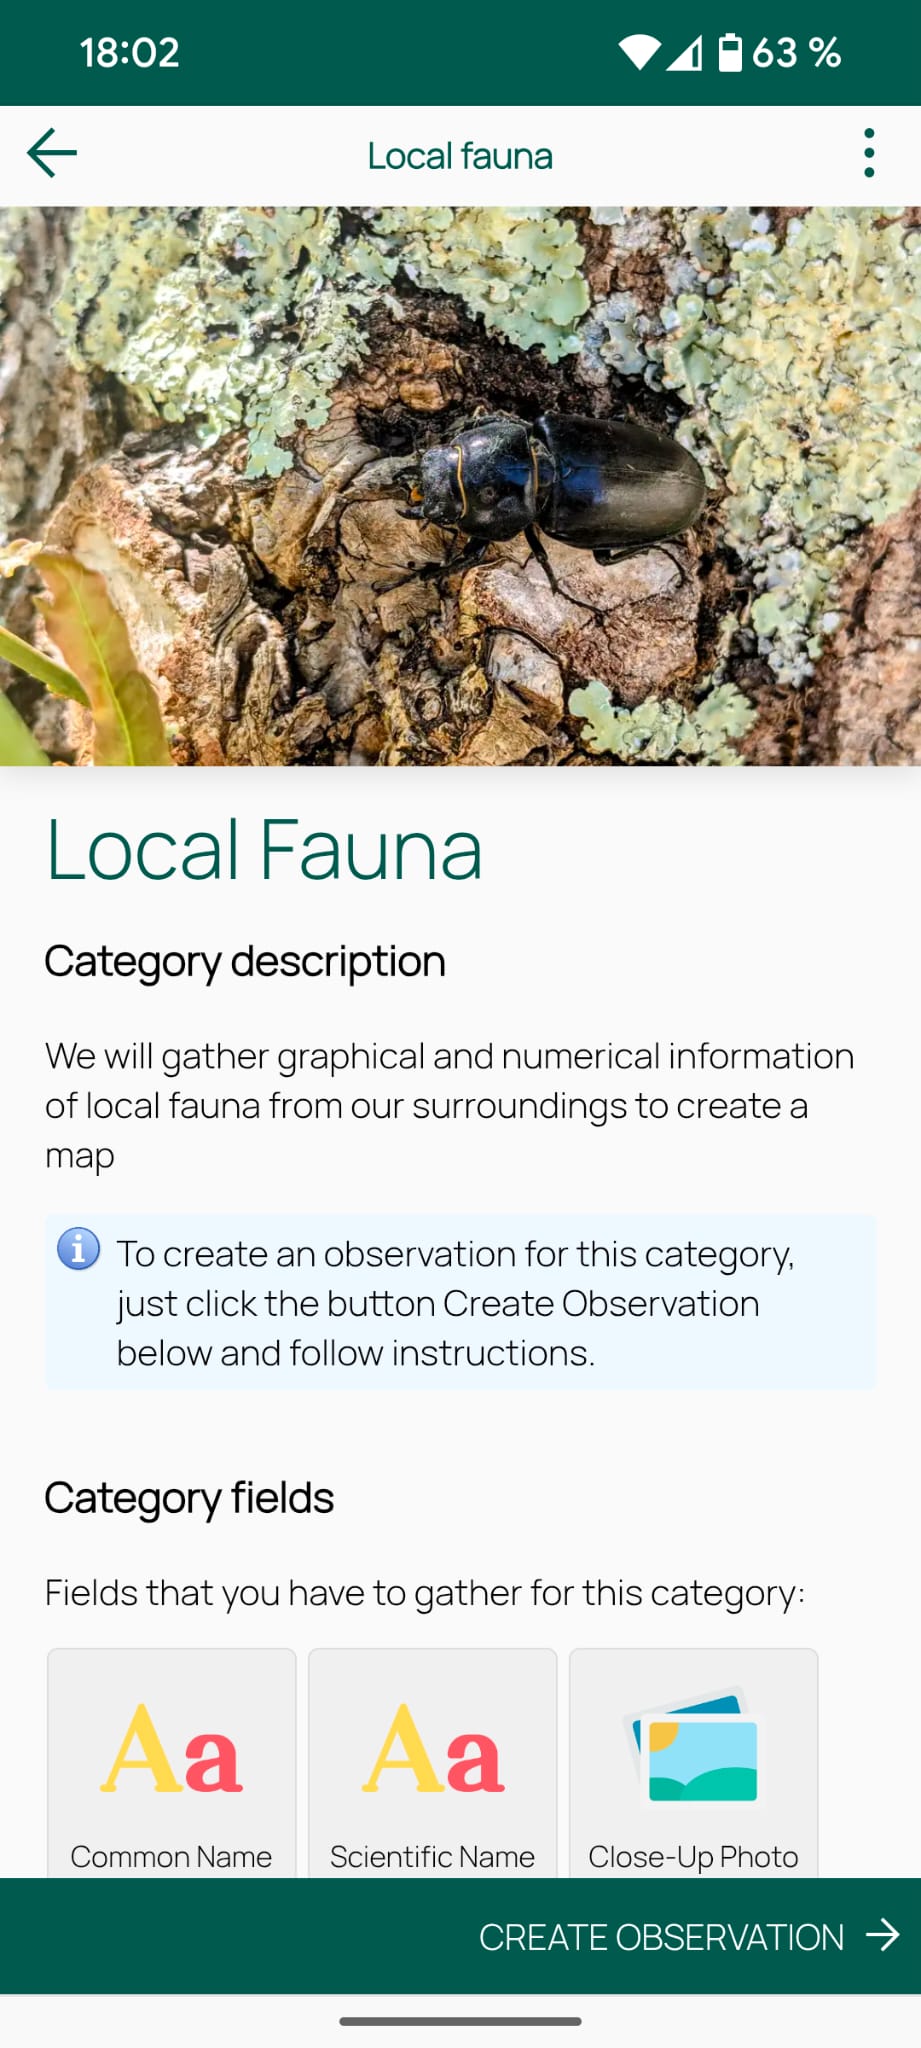
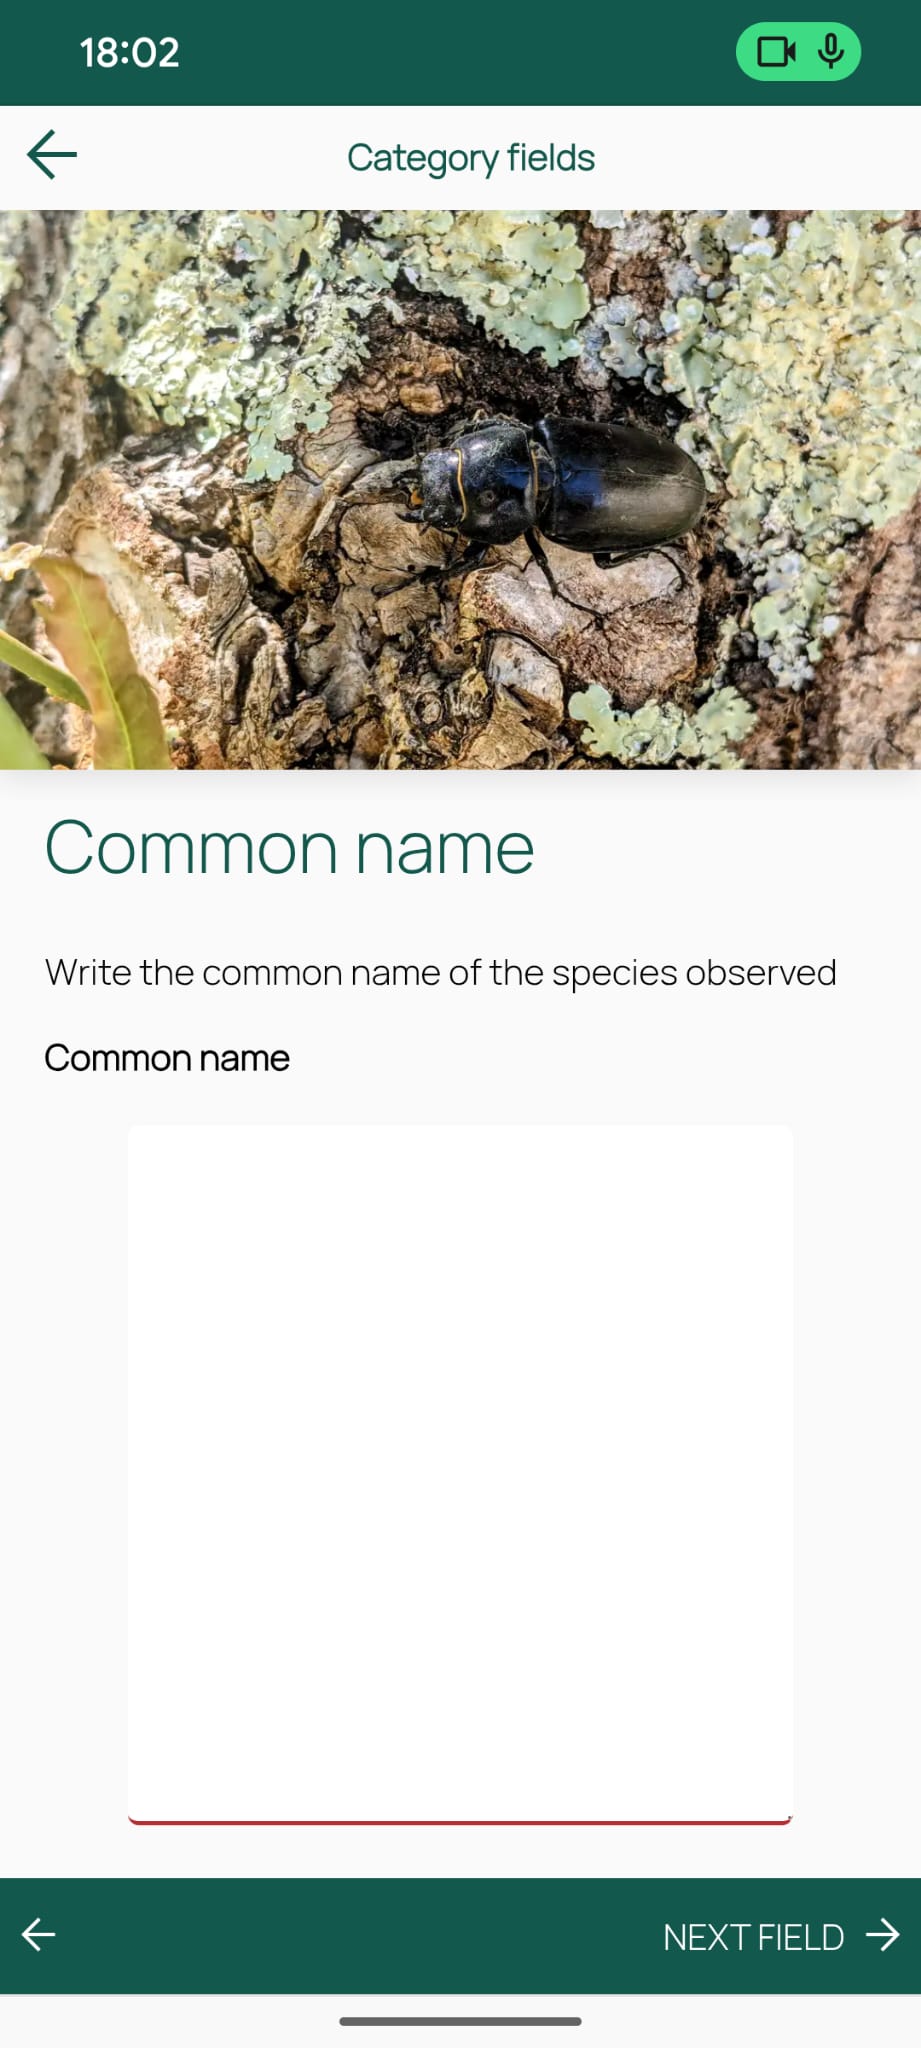
- Complete the observation data (numeric fields, text, audio...) as requested, step by step, clicking "Next field" at the bottom. You can use the arrows to go back or forward to complete the observation data.
- Once you finish, the GPS (if enabled on your phone) will automatically geolocate your position. If your observation was not made in the same place where you are now, use your fingers to move the GPS icon to the correct location.
- You will be asked to upload the observation data or, if you are offline or prefer to do it later from a wifi point, you can save the data on your phone for later.
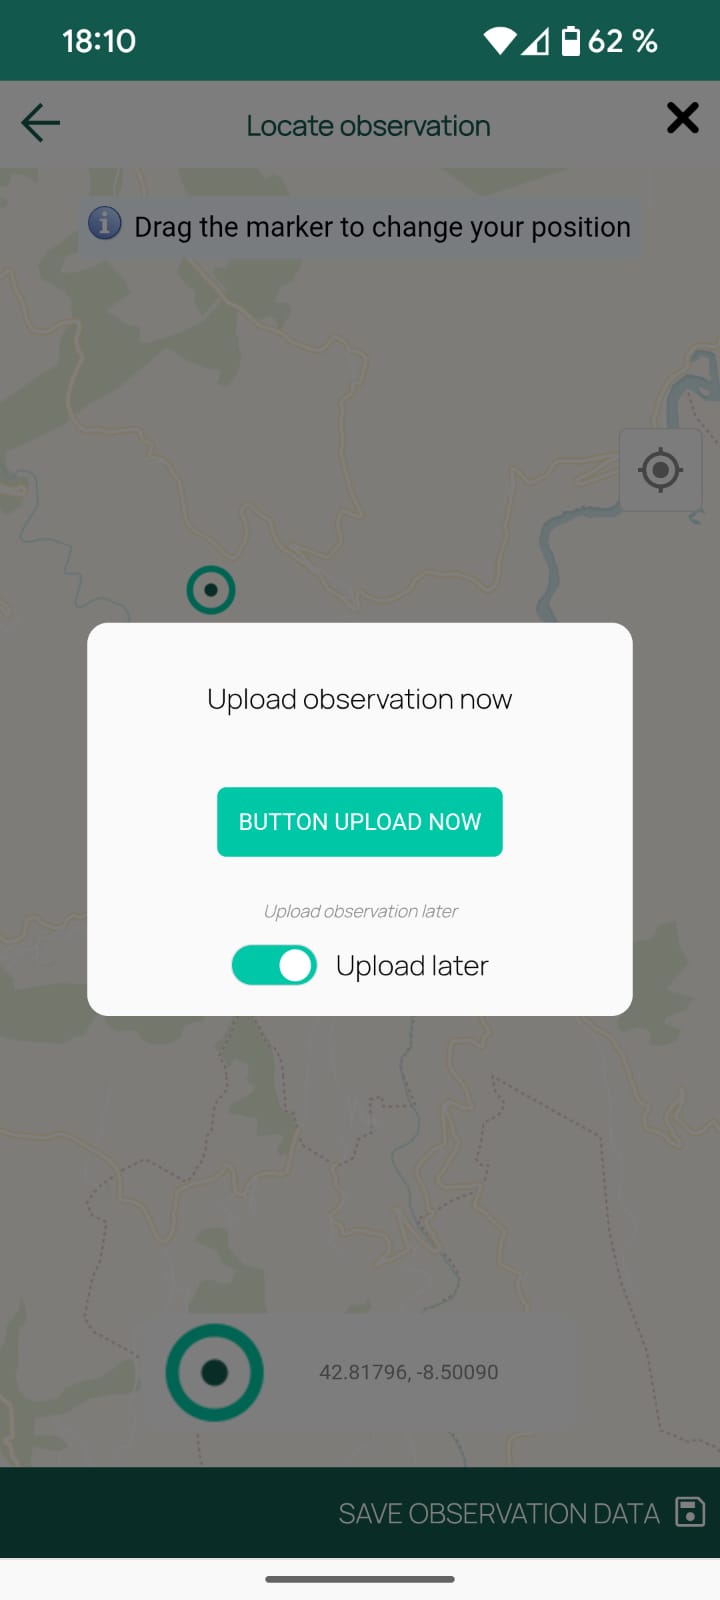
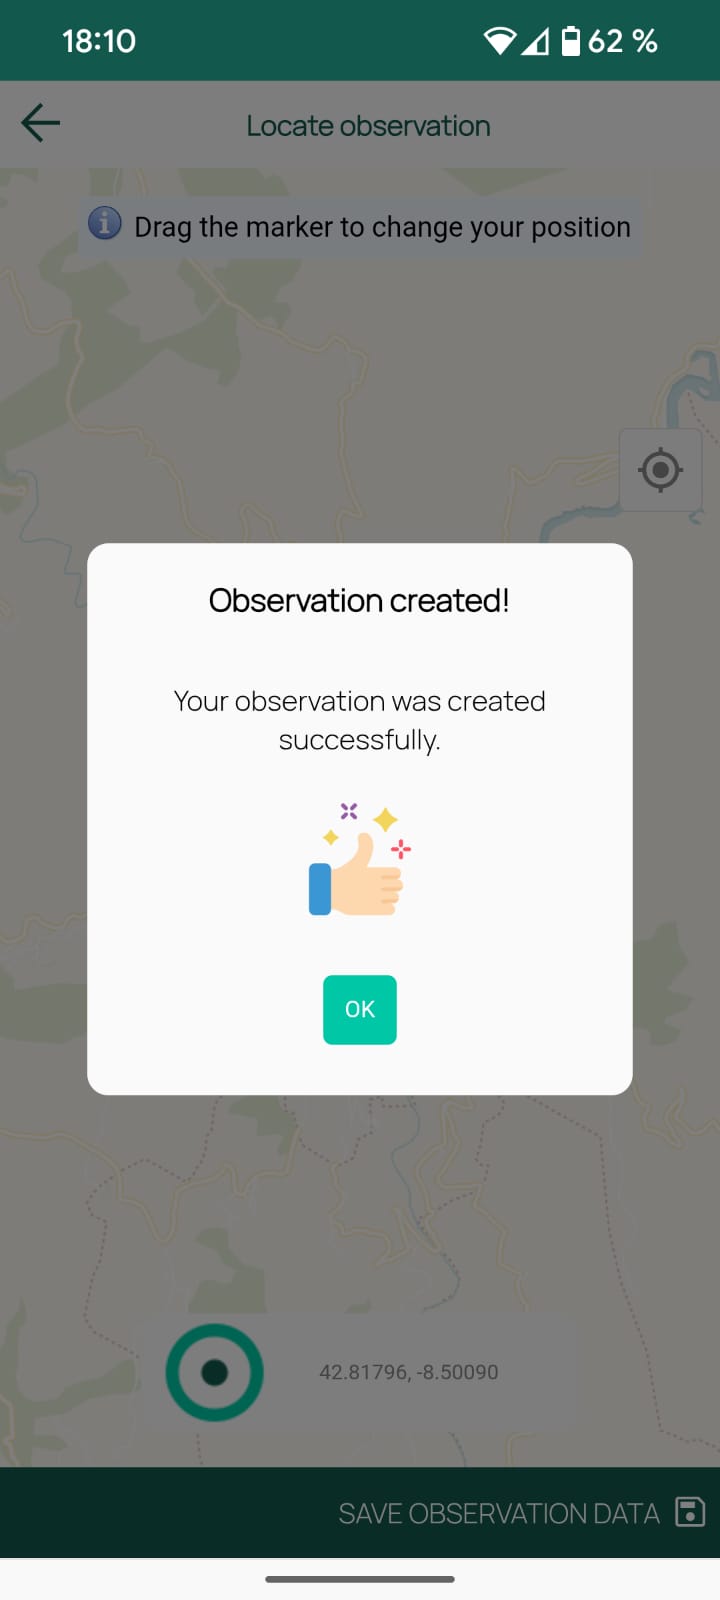
The next time you open the Peneira app, it will remind you to upload pending data. Once your data is uploaded, you will receive a notification window confirming it.